Input Property
We know that @Component decorator functions take object, and this object contains a lot of properties. So in this article we will learn about Input properties which is Inherited from Directive decorator .
Input property is used within one component (child component) to receive a value from another component (parent component). This is a one-way communication from parent to child. A component can receive a value from another component through component input property. Now we will see how to use the input property.
It is the topic of the Component Interaction in angular. As we know, the angular application is based on small components, so passing data from the parent component to the child component is a bit complicated, in this scenario, the input property is useful. The Inputs specify which properties can be set in a component by a parent.
Aliasing Input Property
Input property can alias the name of the input property. Means You can alias our input property so that it is not linked to the actual variable name, we can do it as shown below
@Component({
      selector: 'app-child',
       templateUrl: './child.component.html',
       styleUrls: ['./child.component.css']
       inputs: [isparentdata: PData]
})
export class ChildComponent {
  pData = false;
}
An alternative syntax is available to define input properties in a component.In the above example, we used the "inputs" properties of the object passed to the @Component decorator. Angular also allows you to use an @Input decorator to get the same result:
- @Input is a decorator to mark an input property.
- @Input is used to define an input property to bind the component's input property.
- The input property of the component must be annotated with the input decorator to act as an input property.
We will see the @Input in the subsequent chapter.
Note that the style guide recommended by the angular team to use @Input:
Do Use the @Input() and @Output() class decorators instead of the @Directive and @Component metadata input and output properties:
Consider entering @Input() or @Output() on the same line as the decorated property.
It is true that @Input allows an easy definition of type, scope and default values.
An advantage of using inputs is that class users only need to look at the configuration object passed to the @Component decorator to find the input properties.
An advantages of using @Input is that we can define the type and whether it is private or public as shown below
@Input() public pData: string;
So in this chapter, we will show the data of the parent component in a child component. For this, we need to create two components. Go to the terminal and create two components by writing the following command. Remember that we are using AngularCLI to generate the new component.
Step 1: Create parent and child components
Go to the terminal window and enter the following command.
ng g c parent
ng g c child
So, it will create an individual folder for both components. Type the following command to start angular development server.
ng serve --open
It will open the browser in the port: 4200.
At the moment, only the app.component.ts component is represented in the browser. If we want to render our parent component, we need to include it in an app.component.html file as HTML tags.
app.component.html
<div style="text-align: center">
    <h1>
        Welcome to {{ title }}!
    </h1>
    <app-parent></app-parent>
</div>
Now, if you see in the browser, you can see the representations of the parent component. "Parent work!"
Step 2: Define HTML for parent component
Write the following code in the parent.component.html file.
parent.component.html
<h3>Parent Component</h3>

<label>Parent Component</label>
<input type="text">
First, we pass data from the parent component to the child component. Here is the scenario, when the user enters the something in the text box, we can see its value in the child component.
Step 3: Define HTML for child component
Write the following code in the child.component.html file.
child.component.html
<h3>Child Component</h3>
As we know, this is the child component, so you need to include the <app-child> tag in the parent component. So our main HTML component has this aspect.
parent.component.html
<h3>Parent Component</h3>
<label>Parent Component</label>
<input type="text" />
<app-child></app-child>
So, now our application looks like this.
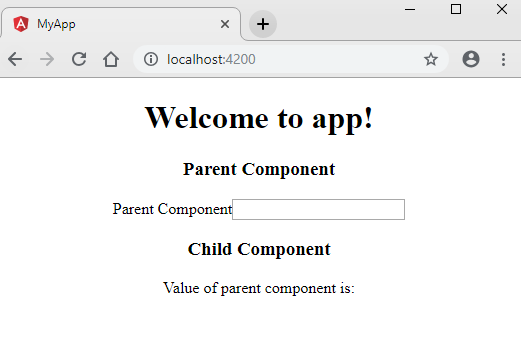
Step 4: Use Input to display parent component value
Create a reference to input text of the parent component. So edit the following lines in the parent.component.html file.
parent.component.html
<h3>Parent Component</h3>

<label>Parent Component</label>
<input
    type="text"
    #pcomponent
    (keyup)="0"
>
<app-child [PData]="pcomponent.value"></app-child>
Here, I first defined the reference for the input tag and then set the event listener. When a user types something in the text box, it will pass the value as a property to the child component.
The child component is ready to receive the property via an input property. So this is the first case of using inputs in angular.
The child.component.ts file looks like this.
child.component.ts
import { Component, OnInit, Input } from '@angular/core';

@Component({
  selector: 'app-child',
  templateUrl: './child.component.html',
  styleUrls: ['./child.component.css'],
  inputs:['PData']
})
export class ChildComponent implements OnInit {
  PData: any;
  constructor() { }

  ngOnInit() {
  }

}
You can see that the property of this component is PData, which is the same property that we wrote in the parent.component.html file.
Finally, our child.component.html file looks like this. We just need to add interpolation to show the parent data in the child component.
child.component.html
<h3>Child Component</h3>

<p>
    Value of parent component is: {{ PData }}
</p>
Now, if you type in the parent text box, its value is printed on the child component. Everything is done through the parent-child node through the input property as shown below